You built your app with Lovable. It looks great. And nobody is coming.
Where are the customers? Ads cost money, and posting on X every day becomes a second job. Search can bring visitors without ad spend, but a new site starts with no articles for Google to find, and we found no built-in blog feature in Lovable's documentation.
This guide fixes that, step by step. You paste one prompt into Lovable, connect it to TalkGenAI, and publish your first article. Each article takes up to 5 minutes to write. A blog is no guarantee of traffic, so we also show how to check that search engines can read your pages.
Key takeaways
- Lovable's documentation lists no built-in blog, so you add one with a prompt.
- Skip Lovable's first secret form. TalkGenAI only creates the secret after you enter your site address.
- Publish your Lovable site again after adding the secret. In our test, the first test event failed with HTTP 500 until we did.
- Check the page source. On our demo site, the article text, headings and structured data were all in the raw HTML.
- Each article comes with article and FAQ structured data, clear headings and a sitemap entry, which helps search engines and AI assistants read and quote your page. No tool can promise rankings or citations.
- Start with drafts, so you read each article before it goes live.
We tested every step on a throwaway demo site. That demo site was also built with Lovable, and the article you will see was written by TalkGenAI. Where something went wrong in our test, we say so, because those are the parts that will save you time.
What you need
- A Lovable project that is published to a public address.
- A TalkGenAI account.
- Patience while Lovable builds the receiver. In our run that took a few minutes.
How it works
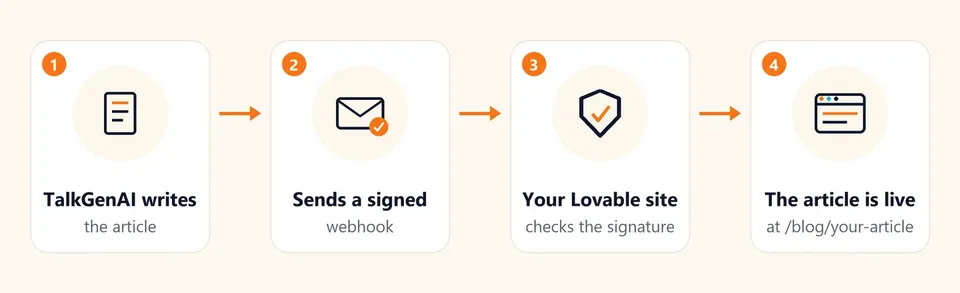
TalkGenAI writes an article and sends it to your site as a signed message (a webhook). Your Lovable site checks the signature, saves the post, and shows it at /blog/your-article. The signature means nobody else can post to your blog.
Step 1: Paste the setup prompt into Lovable
In TalkGenAI, open Integrations, choose Custom site, click Add Site, and open "Setup prompt for your AI builder". Copy it and paste it into a new Lovable project. This is the full prompt:
Add a blog to this site that receives articles from TalkGenAI by webhook.

1. Create a POST endpoint at /api/talkgen-webhook.
2. Read the RAW request body. Verify the header X-TalkGen-Signature equals "sha256=" + hex(HMAC-SHA256(secret, X-TalkGen-Timestamp + "." + rawBody)) using the env var TALKGEN_WEBHOOK_SECRET. Compare in constant time. Reject (401) if the timestamp is older than 5 minutes.
3. Event "ping": answer 200 {"ok":true}.
4. Events "article.published" / "article.updated": JSON body has title, slug, html, excerpt, meta_description, category, status ("draft"|"publish"), images[0].url + alt, schema.article, schema.faq, job_id, existing_id. Upsert the post by job_id (idempotent), store it, show only status "publish" posts publicly. Sanitize the html before rendering it. Put schema.article and schema.faq in the page as JSON-LD.
5. Answer 200 {"id": "<your post id>", "url": "<public post URL>"}.
6. Add a /blog list page and /blog/[slug] page, and add the posts to sitemap.xml.
Lovable builds the receiver, a /blog list page, a page for each post, and a sitemap. In our test it also chose and set up its own place to store the posts. When it finished, it summarised what it had built and what it had tested.
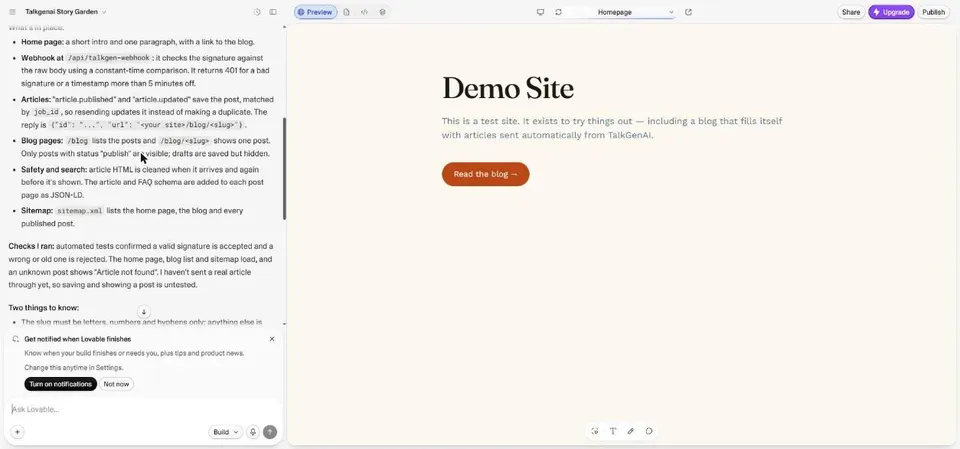
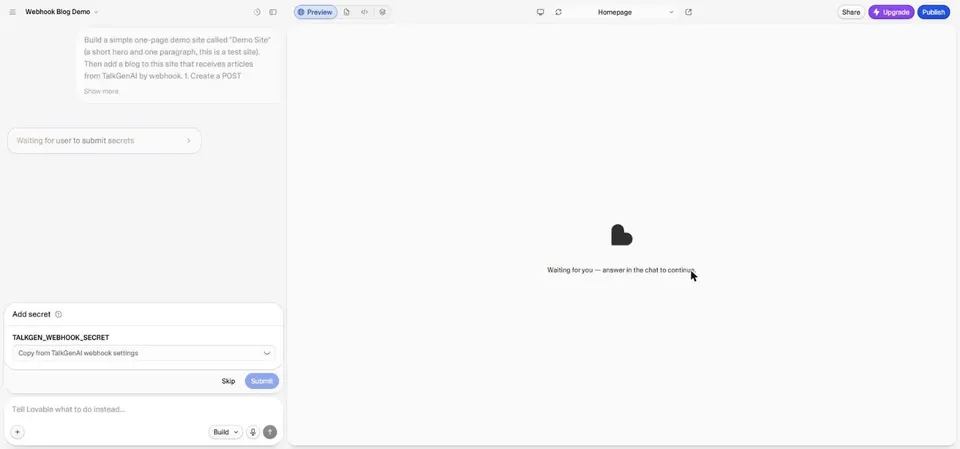
Lovable will ask you for a secret called TALKGEN_WEBHOOK_SECRET right away. Click Skip for now. You do not have the secret yet, because TalkGenAI only creates it in Step 3.
Step 2: Publish your site and copy the address
Click Publish in Lovable. Your endpoint address is your site address plus /api/talkgen-webhook, for example:
https://your-site.lovable.app/api/talkgen-webhook
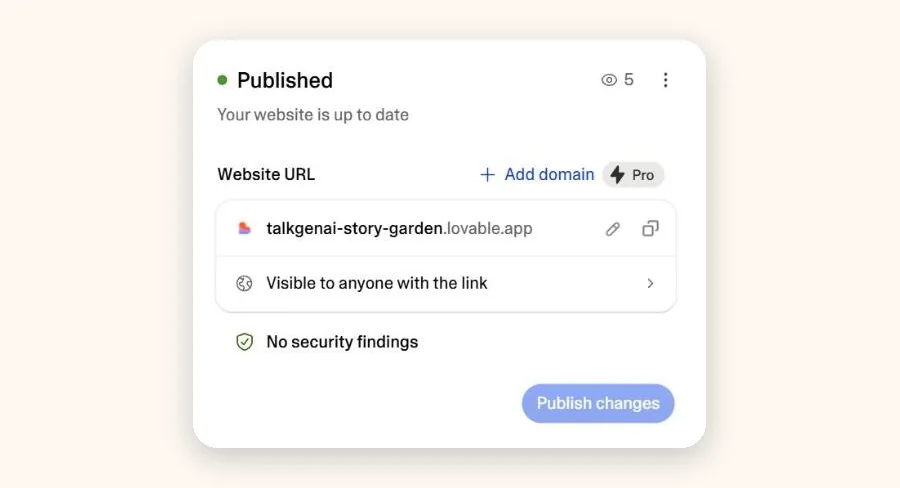
You can check it is alive before doing anything else. A request with no signature should be refused, not ignored. On our site it answered {"error":"Not configured"}, which is the expected answer before the secret exists.
Step 3: Add the site in TalkGenAI
In TalkGenAI, go to Integrations, choose Custom site, click Add Site, paste your endpoint address, give the site a name, and click Create connection.
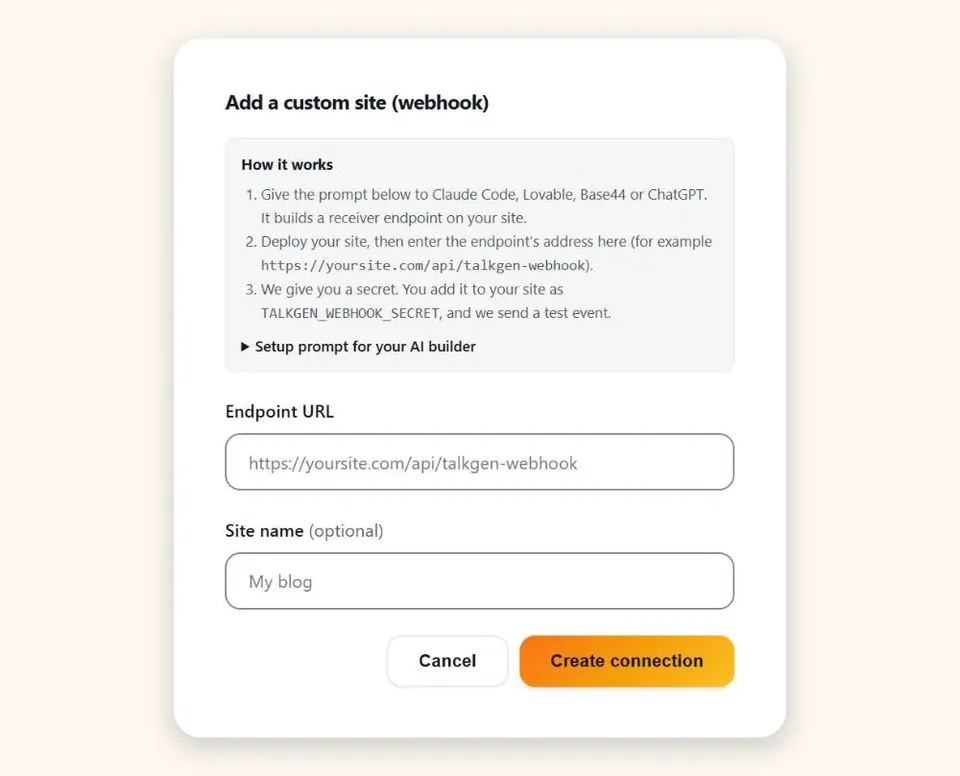
TalkGenAI now shows your signing secret. It is shown only once, so copy it. Do not paste it into the Lovable chat or into any public file.
Step 4: Add the secret to Lovable
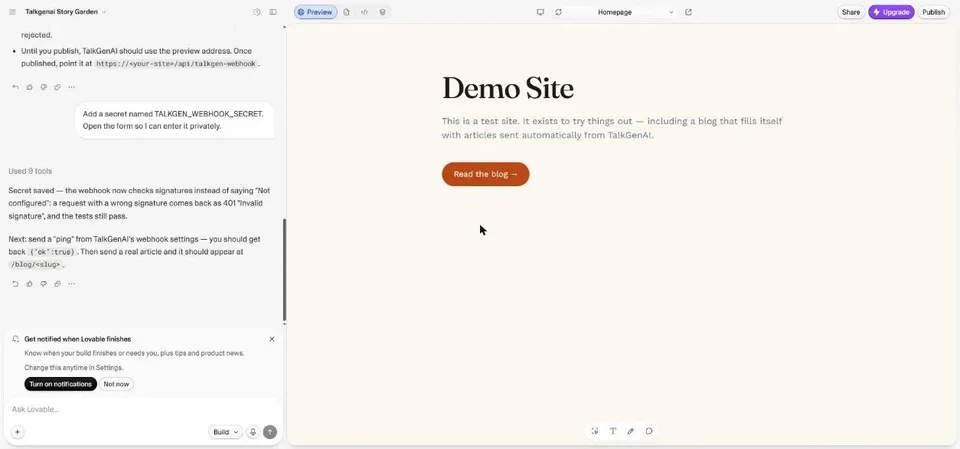
Go back to Lovable and type: Add a secret named TALKGEN_WEBHOOK_SECRET. Lovable opens a private form. Paste the secret there and submit.
Step 5: Publish again
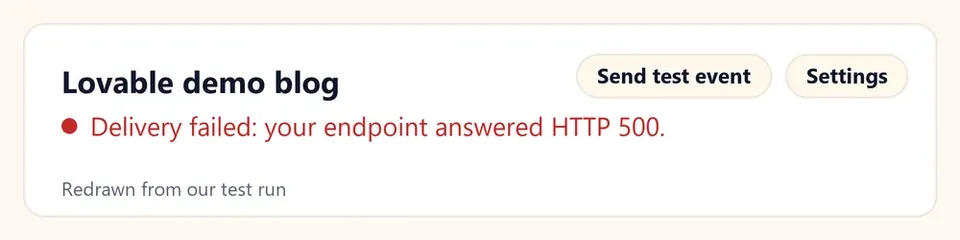
This is the step we got wrong the first time. After you save the secret, publish your site again (Publish, then Update). Until you do, the live site does not have the secret.
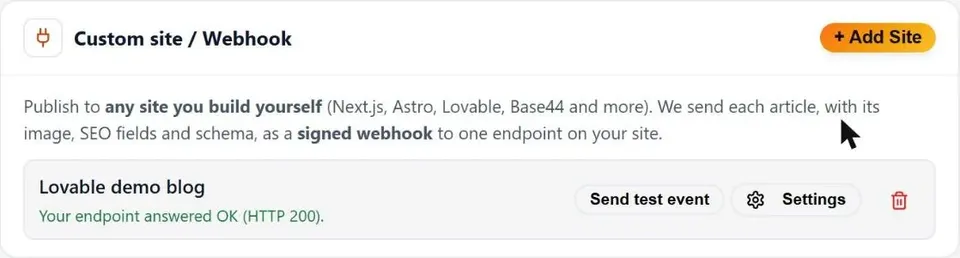
When we skipped it, TalkGenAI's Send test event failed with this message. We redrew it from our run so it is easier to read:
After republishing, the same test passed:
Step 6: Write and publish your first article
In TalkGenAI, open Create Article, enter a topic, choose the length, and generate. We used a short article. Not sure what to write about? Pick topics by the job your customer is trying to get done, as we explain in SEO for SaaS: pick keywords by the job. When the article is ready, click Publish to my site and choose your Lovable site.
TalkGenAI warned us that this connection was set to publish live, so the article went public with no review. For your own site, set the connection to draft first so you can read each article before it goes out.
Step 7: Check that it worked
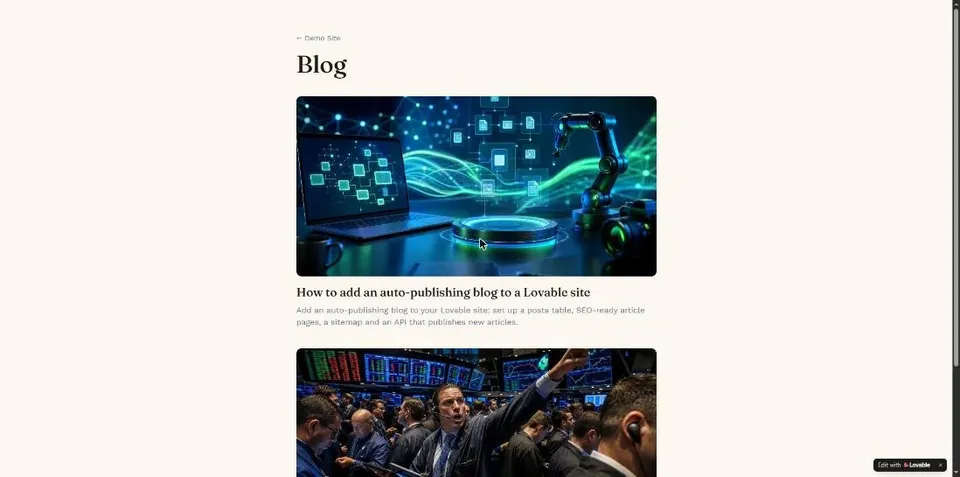
Open /blog on your site. Your article should be listed, and its own page should open.
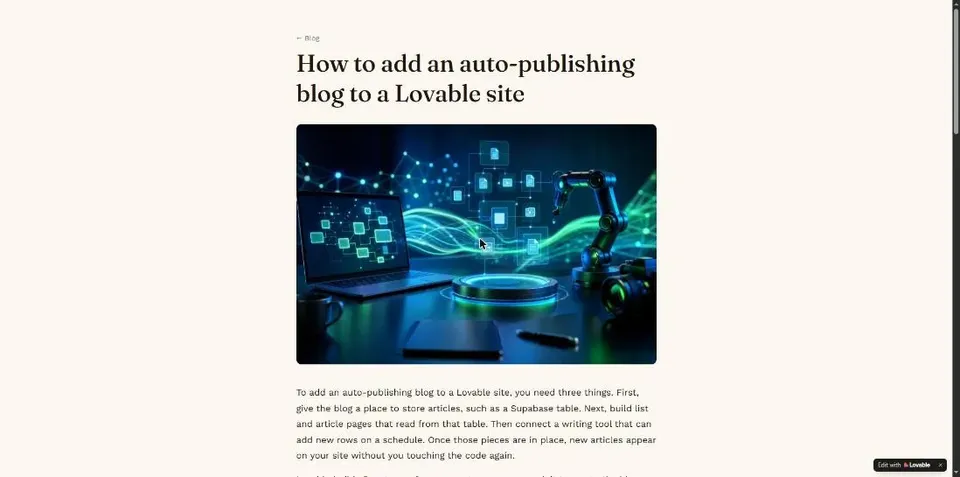
Check that search engines can read it. Some sites built with AI tools send search engines an almost empty page that fills in only in the browser. We checked the raw page our demo site returns (one check, unedited). It contained the title, the meta description, one h1, four h2 headings, twelve paragraphs (about 3,900 characters of visible text), and two blocks of structured data, including the FAQ markup. The sitemap listed the article too.
That is what we saw on our demo site. It does not guarantee Google will index or rank a page, and we do not promise that. The structured data is also what AI assistants such as ChatGPT, Claude and Gemini can read when they look at a page. We can't promise they will cite you. For more on how AI assistants choose what to quote, see LLM SEO: what actually gets cited by ChatGPT. You can run the same check yourself: view the page source of one article and look for your headline and text in it. Lovable's SEO documentation says apps created since 13 May 2026 return full HTML from the server, and older apps are prerendered for verified crawlers.
One small thing we noticed: the canonical link on our posts was relative (/blog/slug) and not a full address. Lovable's SEO documentation says its SEO and AI review (in Analytics, under SEO & AI) checks canonical tags, and that its "Try to fix" button can apply fixes in your project. Run it after your first article. Then connect Google Search Console, so you can see which pages get clicks and decide what to write next: Google Search Console + AI agent: what to write next.
If something goes wrong
- Test event says HTTP 500 or "Not configured": the secret is missing on the live site. Add it (Step 4) and publish again (Step 5).
- 401 or "Invalid signature": the secret in Lovable does not match the one TalkGenAI gave you. Remove the connection in TalkGenAI and add it again to get a new secret.
- The article is not on your blog: check whether it was sent as a draft. Only posts marked "publish" are shown.
- Slug rejected: slugs may contain only letters, numbers and hyphens.
Other ways to add a blog to Lovable
You can build the blog by hand with a database and ask Lovable to add pages for it. That gives you full control, but you write and maintain the articles. You can also use a hosted blog service that connects to your site. The approach in this guide is for when you want articles to arrive on their own and you are happy to run the blog on your own site.
Questions
Do I need a custom domain? The steps work on the address Lovable gives you. According to Lovable's documentation, connecting a custom domain needs a paid Lovable plan, and a custom domain helps keep backlinks and canonical URLs under one domain. Only apps published publicly can appear in search.
Does this use Lovable credits? Building the receiver is a normal Lovable request, so it uses credits like any build. After that, Lovable's usage documentation says a published app's backend (compute, network, database) counts as run usage from the same credit balance. It does not say how incoming webhook requests are counted, so check the usage page in your Lovable workspace. The documentation also says that if a workspace runs out of credits, the published site stays live but apps that rely on the built-in backend can pause.
Can I edit an article after it is published? Yes. The setup prompt tells Lovable to match posts by their ID. In our test we published an article that was already on the demo site a second time. The site still had two posts, not three, and the post's last-modified time moved forward, so the re-sent article updated the same post and did not make a copy. We tested this with an unchanged article. To refresh older posts later, see How to update old blog posts.
Will this make my site rank on Google? No tool can promise that. A blog gives you pages to be found, and the quality of the writing matters. We only checked that your pages can be read.
Does it work with Base44 or other builders? Yes for Base44: we tested it step by step in Base44 SEO: how to add a blog that brings visitors to your app. Any site that can receive a signed webhook can use the same connection. If your site runs on Webflow, Framer, Wix, Shopify or WordPress, see our guides for Webflow, Framer, Wix, Shopify and WordPress.
Related guides
- SEO for SaaS: pick keywords by the job, not competitors
- LLM SEO: what actually gets cited by ChatGPT
- Google Search Console + AI agent: what to write next
- How to update old blog posts: which ones, what to change
- AI Overviews SEO: how to get cited by Google
- All TalkGenAI guides
The short version
- Paste the setup prompt into Lovable and skip the secret form.
- Publish, and copy your endpoint address.
- Add the site in TalkGenAI and copy the secret.
- Add the secret in Lovable.
- Publish again, then send the test event.
- Write your first article and publish it.